
I love to make hats! I make them for my kids, nieces, friends and my kids friends... I have even sold a few, though I don't sell finished crochet items anymore. With a basic hat pattern, you can make all sorts of fun and creative hats. It is so easy!
Today, I am going to share my basic crochet hat pattern with you in all of the different sizes. There are a lot of different basic hat patterns, but I find that this is the one that I like to use the most. This pattern is very versatile. You can make a beanie, or you can add earflaps. You can add crochet tassels, or braided tassels. Or.... leave the tassels off. Whatever your style. As soon as you get the basic hat idea down, you can add different stitches so that your hat has texture. Add different colors to make stripes. The possibilities are endless.
In the next few months I will be sharing all sorts of different hat patterns with you using the basic hat pattern. This is going to be fun!
So, here is my basic hat pattern. Enjoy!
For a list of abbreviations click here.
materials needed:
-worsted weight yarn
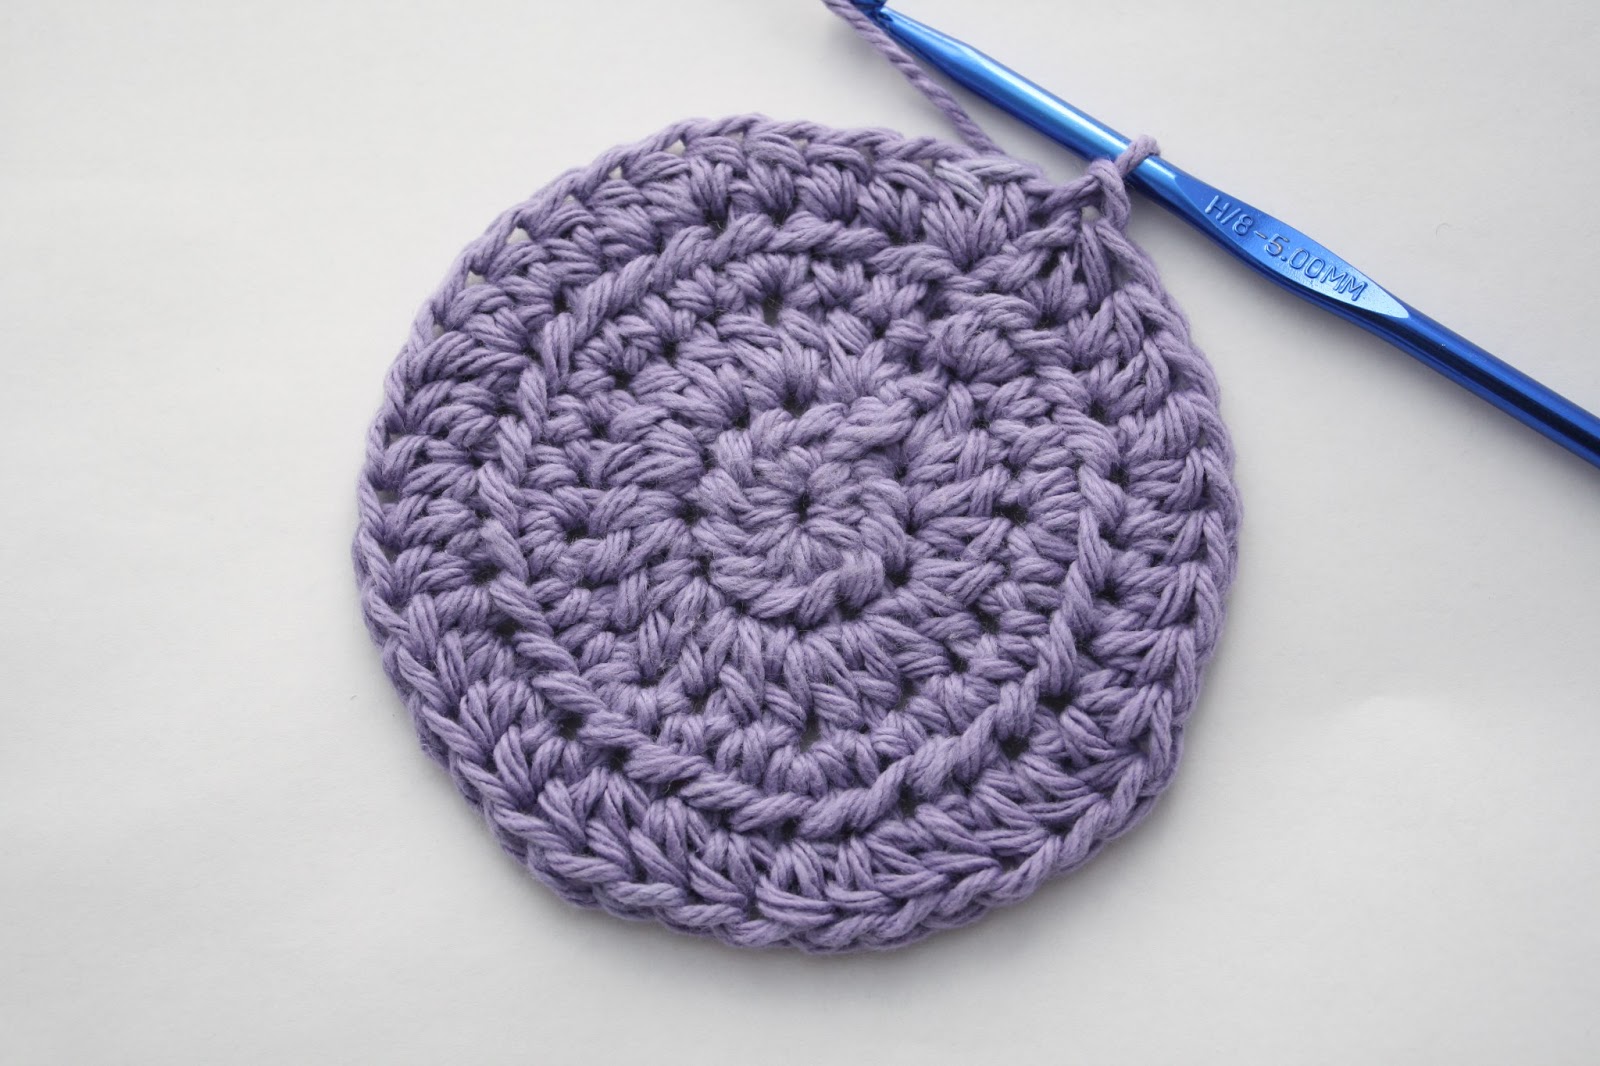
-crochet hook size: H/805.00MM
-sharp needle for weaving your loose ends and sewing your embellishments to your hat
-scissors
notes:
-This pattern is written in 6 different sizes so that you can crochet one for everyone! Each size is written out separately to make it easier for a beginner to read, so scroll down to the size that you would like to make.
-Gauge: 6 sts in 5 rows = 2" (5 cm) If your gauge is not right, go up or down a size crochet hook in order to get the right gauge. Be sure to check your gauge so that your hat will turn out the right size.
-Crochet over your loose ends as you go along so you won't have as many to weave in when you are done with your hat.
-The pictures that are included are for size 0-3 months. If you are making a larger size hat your hat will have more stitches and rows than the pictures provided. The pictures are just a basic idea of what your hat should look like as you are making it.
-Here is a chart of what the finished measurement of each hat should be. If you want your hat to be longer or shorter, you can always add or subtract Rnds before you crochet the trim.
And here we go!!
Size 0-3 months:
With any color of yarn, make a magic loop, ch 1

Rnd 1: ch 1, 12 hdc in the ring, join with a sl st to the first hdc, ch 1, turn (12 hdc)

Pull on the tail end to tighten up the ring.

Rnd 2: 2 hdc in each st around, join with a sl st, ch 1, turn (24 hdc)

Rnd 3: (hdc in the next 2 sts, 2 hdc in the next st) around, join with a sl st, ch 1, turn (32 hdc)

Rnd 4: (hdc in next 3 sts, 2 hdc in the next st) around, join with a sl st, ch 1, turn (40 hdc)
Rnd 5-9: hdc in each st around, join with a sl st, ch 1, turn (40 hdc)
Rnd 10: hdc in each st around, join with a sl st, (40 hdc)
Trim: You can use the same color yarn, or a different color to crochet the trim. If you are using the same color yarn, do not fasten off. If you decide to use a different color, fasten off. If you do use a different color, join with a sl st in any stitch near where you fastened off and then continue on with rnd 11.
Rnd 11: ch 1, sc in each st around, join with a sl st, fasten off. Weave in your loose end and you are finished!

Size 3-6 months:
With any color of yarn, make a magic loop, ch 1
Rnd 1: ch 1, 12 hdc in the ring, join with a sl st to the first hdc, ch 1, turn (12 hdc)
Rnd 2: 2 hdc in each st around, join with a sl st, ch 1, turn (24 hdc)
Rnd 3: (hdc in the next 2 sts, 2 hdc in the next st) around, join with a sl st, ch 1, turn (32 hdc)
Rnd 4: (hdc in next 3 sts, 2 hdc in the next st) around, join with a sl st, ch 1, turn (40 hdc)
Rnd 5: (hdc in the next 9 sts, 2 hdc in the next st) around, join with a sl st, ch 1, turn (44 hdc)
Rnd 6-11: hdc in each st around, join with a sl st, ch 1, turn (44 hdc)
Rnd 12: hdc in each st around, join with a sl st, (44 hdc)
Trim: You can use the same color yarn, or a different color to crochet the trim. If you are using the same color yarn, do not fasten off. If you decide to use a different color, fasten off. If you do use a different color, join with a sl st in any stitch near where you fastened off and then continue on with rnd 13.
Rnd 13: ch 1, sc in each st around, join with a sl st, fasten off. Weave in your loose end and you are finished!
Size 6-12 months:
With any color of yarn, make a magic loop, ch 1
Rnd 1: ch 1, 12 hdc in the ring, join with a sl st to the first hdc, ch 1, turn (12 hdc)
Rnd 2: 2 hdc in each st around, join with a sl st, ch 1, turn (24 hdc)
Rnd 3: (hdc in the next 2 sts, 2 hdc in the next st) around, join with a sl st, ch 1, turn (32 hdc)
Rnd 4: (hdc in next 3 sts, 2 hdc in the next st) around, join with a sl st, ch 1, turn (40 hdc)
Rnd 5: (hdc in the next 4 sts, 2 hdc in the next st) around, join with a sl st, ch 1, turn (48 hdc)
Rnd 6-12: hdc in each st around, join with a sl st, ch 1, turn (48 hdc)
Rnd 13: hdc in each st around, join with a sl st, (48 hdc)
Trim: You can use the same color yarn, or a different color to crochet the trim. If you are using the same color yarn, do not fasten off. If you decide to use a different color, fasten off. If you do use a different color, join with a sl st in any stitch near where you fastened off and then continue on with rnd 14.
Rnd 14: ch 1, sc in each st around, join with a sl st, fasten off. Weave in your loose end and you are finished!
Size 12 months - 3 years:
With any color of yarn, make a magic loop, ch 1
Rnd 1: ch 1, 12 hdc in the ring, join with a sl st to the first hdc, ch 1, turn (12 hdc)
Rnd 2: 2 hdc in each st around, join with a sl st, ch 1, turn (24 hdc)
Rnd 3: (hdc in the next 2 sts, 2 hdc in the next st) around, join with a sl st, ch 1, turn (32 hdc)
Rnd 4: (hdc in next 3 sts, 2 hdc in the next st) around, join with a sl st, ch 1, turn (40 hdc)
Rnd 5: (hdc in the next 4 sts, 2 hdc in the next st) around, join with a sl st, ch 1, turn (48 hdc)
Rnd 6: (hdc in the next 11 sts, 2 hdc in the next st) around, join with a sl st, ch 1, turn (52 hdc)
Rnd 7-14: hdc in each st around, join with a sl st, ch 1, turn (52 hdc)
Rnd 15: hdc in each st around, join with a sl st, (52 hdc)
Trim: You can use the same color yarn, or a different color to crochet the trim. If you are using the same color yarn, do not fasten off. If you decide to use a different color, fasten off. If you do use a different color, join with a sl st in any stitch near where you fastened off and then continue on with rnd 16.
Rnd 16: ch 1, sc in each st around, join with a sl st, fasten off. Weave in your loose end and you are finished!
Size 3-10 years:
With any color of yarn, make a magic loop, ch 1
Rnd 1: ch 1, 12 hdc in the ring, join with a sl st to the first hdc, ch 1, turn (12 hdc)
Rnd 2: 2 hdc in each st around, join with a sl st, ch 1, turn (24 hdc)
Rnd 3: (hdc in the next 2 sts, 2 hdc in the next st) around, join with a sl st, ch 1, turn (32 hdc)
Rnd 4: (hdc in next 3 sts, 2 hdc in the next st) around, join with a sl st, ch 1, turn (40 hdc)
Rnd 5: (hdc in the next 4 sts, 2 hdc in the next st) around, join with a sl st, ch 1, turn (48 hdc)
Rnd 6: (hdc in the next 5 sts, 2 hdc in the next st) around, join with a sl st, ch 1, turn (56 hdc)
Rnd 7-15: hdc in each st around, join with a sl st, ch 1, turn (56 hdc)
Rnd 16: hdc in each st around, join with a sl st, (56 hdc)
Trim: You can use the same color yarn, or a different color to crochet the trim. If you are using the same color yarn, do not fasten off. If you decide to use a different color, fasten off. If you do use a different color, join with a sl st in any stitch near where you fastened off and then continue on with rnd 17.
Rnd 17: ch 1, sc in each st around, join with a sl st, fasten off. Weave in your loose end and you are finished!
Size 10 years - Adult
With any color of yarn, make a magic loop, ch 1
Rnd 1: ch 1, 12 hdc in the ring, join with a sl st to the first hdc, ch 1, turn (12 hdc)
Rnd 2: 2 hdc in each st around, join with a sl st, ch 1, turn (24 hdc)
Rnd 3: (hdc in the next 2 sts, 2 hdc in the next st) around, join with a sl st, ch 1, turn (32 hdc)
Rnd 4: (hdc in next 3 sts, 2 hdc in the next st) around, join with a sl st, ch 1, turn (40 hdc)
Rnd 5: (hdc in the next 4 sts, 2 hdc in the next st) around, join with a sl st, ch 1, turn (48 hdc)
Rnd 6: (hdc in the next 5 sts, 2 hdc in the next st) around, join with a sl st, ch 1, turn (56 hdc)
Rnd 7: (hdc in the next 6 sts, 2 hdc in next st) around, join with a sl st, ch 1, turn (64 hdc)
Rnd 8-18: hdc in each st around, join with a sl st, ch 1, turn (64 hdc)
Rnd 19: hdc in each st around, join with a sl st, (64 hdc)
Trim: You can use the same color yarn, or a different color to crochet the trim. If you are using the same color yarn, do not fasten off. If you decide to use a different color, fasten off. If you do use a different color, join with a sl st in any stitch near where you fastened off and then continue on with rnd 20.
Rnd 20: ch 1, sc in each st around, join with a sl st, fasten off. Weave in your loose end and you are finished!
Now that you are finished with your hat, you can add embellishments. I have a lot of different crochet flowers in my tutorials section that you could add as an embellishment if you would like. I added this flower to my hat, and just sewed it onto my hat with the loose end on the flower. Be sure to leave a long loose end if you are going to sew a flower to your hat.

If you want to make a matching crochet hat for your daughter's American Girl 18" doll, or for a Bitty Baby Doll, make newborn size. I have found that the newborn size fits them perfectly!

Next I will be posting about how to crochet earflaps onto your hat if you would like to. Be sure to check back!
Thanks for the pattern! I made it green and purple as a Teenage Mutant Ninja Turtle hat. Came out great! I like the chain when when turn because it closes up the unsightly gap that occurs when you move up a row. Love your patterns!!!
ReplyDelete