
Materials Needed:
-Size H Crochet Hook
-Worsted Weight Yarn (I used Peaches & Creme 4 Ply 100% Cotton Yarn)
-Wooden Button
-Sharp Needle to sew the button on
-Size H Crochet Hook
-Worsted Weight Yarn (I used Peaches & Creme 4 Ply 100% Cotton Yarn)
-Wooden Button
-Sharp Needle to sew the button on
Notes:
-Be sure to crochet over your loose ends as you go along so you won't have as many to weave in when you are finished.
-Gauge: 6 sts and 5 rows = 2" (5 cm) If your gauge is not right, go up or down a size crochet hook in order to get the right gauge.
-All apples are a different size, this pattern is written for an average size apple. If you have a very small, or very large apple, you can move up or down a crochet hook size so that your cozy will fit your apple.
Instructions:
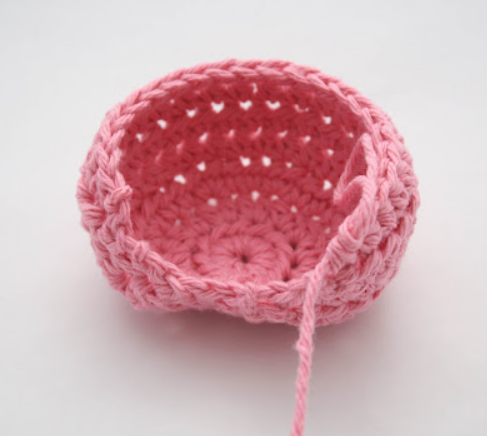
Ch 4, join with a sl st to form a ring

Rnd
1: Ch 1, work 12 hdc in the ring, join with a sl st to the first hdc (12 hdc)


Rnd
3: Ch 1, turn (2 hdc in next st, hdc in next 2 sts) around, join with a sl st
to first hdc (32 hdc)


Row
5: Ch 1, turn, sc first 2 sts together, hdc in next 24 sts, sc last 2 sts
together (26 sts)

Row 6: Ch 1, turn, sc first 2 sts together, hdc in next 22 sts, sc last 2 sts together (24 sts)

Row
7: Ch 1, turn, sc first 2 sts together, hdc in next 20 sts, sc last 2 sts
together (22 sts)

Row 9: Ch 1, turn, sc first 2 sts together, hdc in next 18 sts, sc
last 2 sts together (20 sts)

Row 10: Ch 1, turn, sc first 2 sts together, hdc in next 16 sts,
sc last 2 sts together, turn (18 sts) Fasten Off.

Edging:
With Green yarn,
join with a sl st in the same st where you just fastened off.


Ch 15

sl st in the previous st

Now,
sc evenly around the edge of the apple cover untill you get to the top of the
"U".


Now
working on the opposite side, dc in each of next 3 sts, hdc in next st, sc in
next st, sl st into the first st


Now,
sl st down the center of your leaf,

ch
1, sc in next st

Now,
repeat to make one more leaf. Start with the ch 7.

Now,
continue to sc around the rest of your apple cover edge. Join with a sl st to
the first sc, fasten off.

Sew
your button on. I used a wooden 7/8" button, but you can use whatever size
you would like. Just make sure it is in the right spot before you start sewing
:)

Weave
in your loose ends, and you are finished!
I
think it would be fun to try making this in a bunch of different colors. Enjoy your Apple Cozy!


Love your tutorial, I've pinned it and just made it for the teacher's at my son's school. Thank you for a great tut!
ReplyDeleteThank you Brigitte!
DeleteLove love love!
ReplyDeleteGreat pattern - thanks for sharing!!! ...Going to make several more.
ReplyDeleteJust a quick note - perhaps from row 5 and on, when you mark the st count, you mean, for example, 26 sts instead of 26 hdc?
Thanks again!
Oh yes you are right! Thank you for catching that for me :)
DeleteThanks. Making several for our harvest festival meal with friends. Thanks for sharing.
ReplyDeleteThanks. Making several for our harvest festival meal with friends. Thanks for sharing.
ReplyDeleteI love your tutorial, you are a great teacher. Thank you.
ReplyDeleteThank you so much!
DeleteThis is super cute!! :)
ReplyDeleteyou're amazing. thank you for sharing...*hugs*
ReplyDeleteThank you very much for the pattern. I made few and gave to friends... Everyone loved.
ReplyDeleteThis comment has been removed by the author.
ReplyDeleteThe simpler something is, the better it usually works. Detox shampoos are on the same boat. It may be more appealing to choose a product with a lengthy set of instructions that must be followed. However, even a single blunder might set you up for failure. In this case, your job may be on the line, something simple and easy may be the best option. Efficient Customer Service: The FAQs on the brand website offers valuable information and answers commonly asked questions Visit: https://www.urineworld.com/
ReplyDeleteI am so used to learn crocheting by watching video tutorials. I am so used to follow crochet patterns of the Japanese diagrams but when coming to this kind of tutorials I struggled all through out although it may look simple. Anyway thanks to you for the turorial. Thank you again. Have a great day to everyone out there...from Malaysia.
ReplyDelete