
Making a Slip Knot for Crochet


When you start your crochet project, you will either start with a slip knot, or a magic ring.  Today I am going to show you how to make a simple slip knot!  With some practice, you will find that this is pretty easy.


Grab any size crochet hook, and a ball of yarn and lets start practicing.  Grab the end of your yarn.


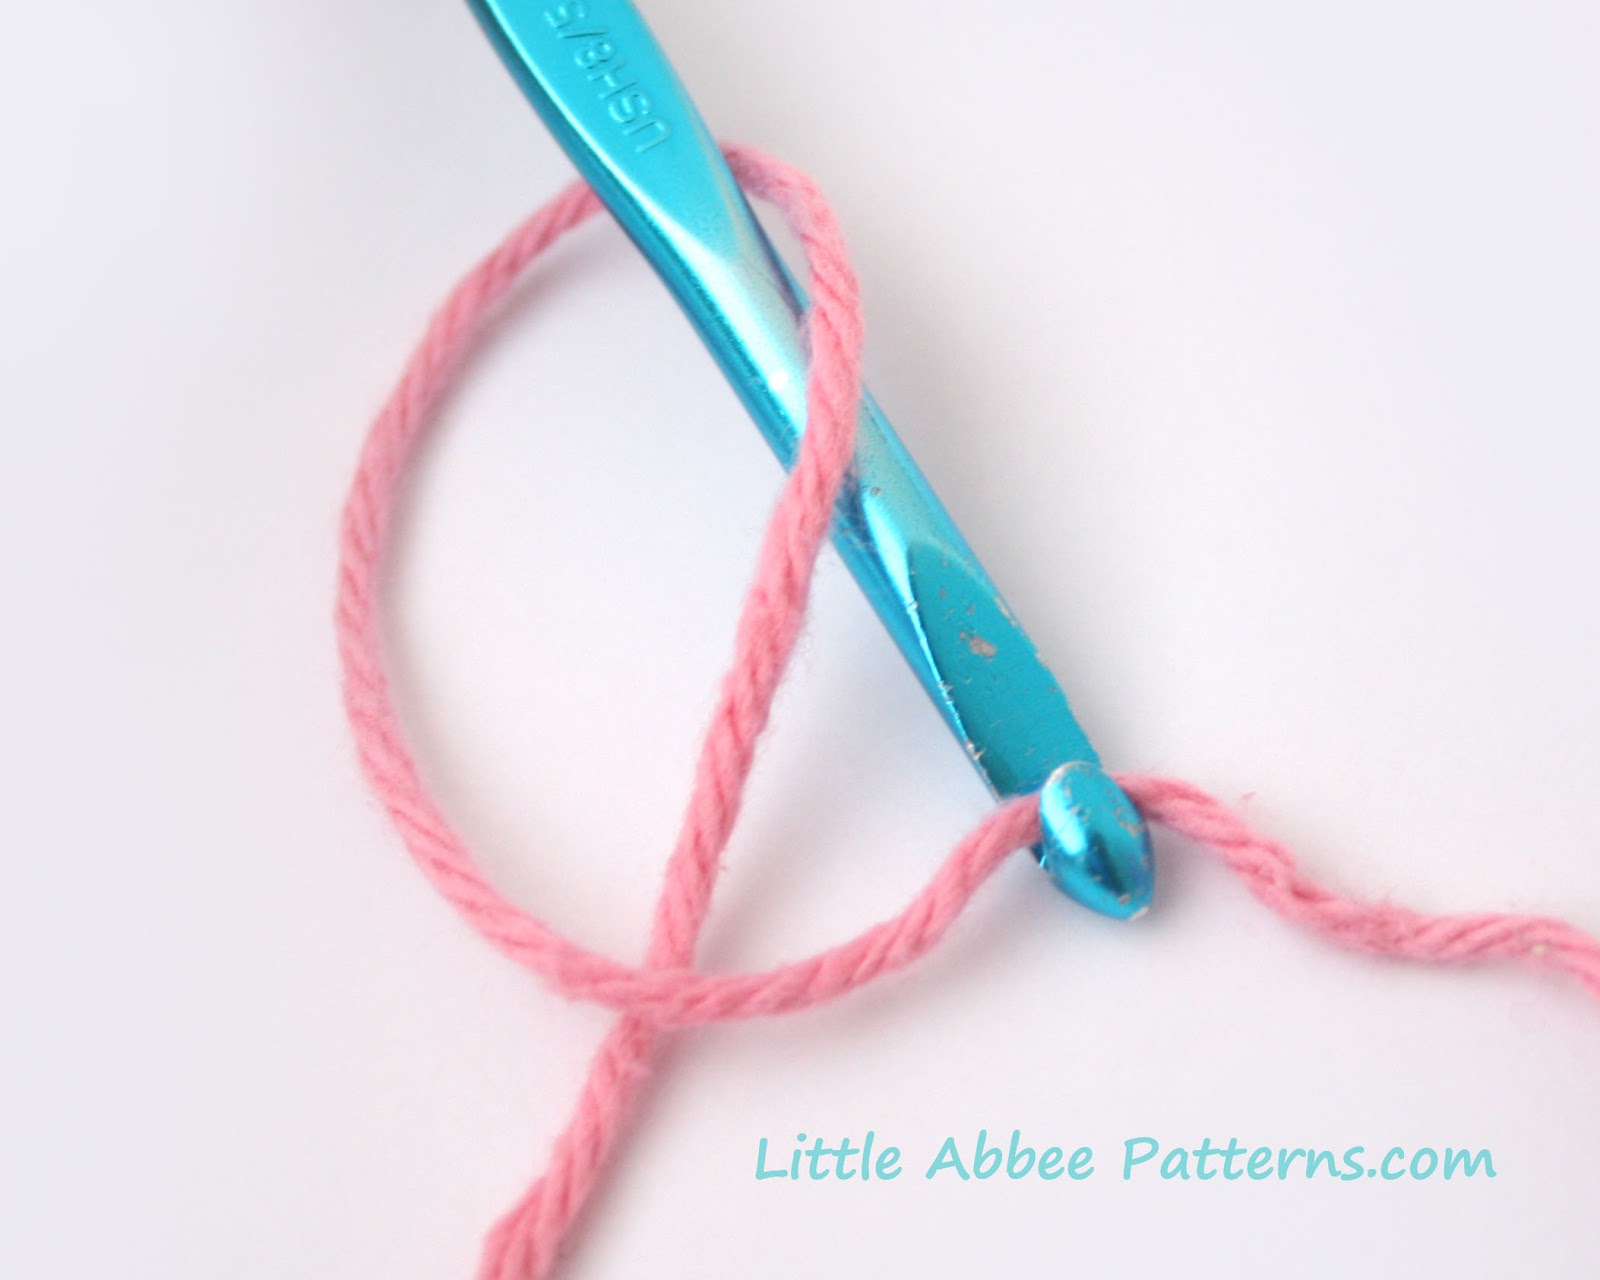
Make a loop as pictured below.


Put your crochet hook into the loop,


hook and pull the yarn through.  Be sure to pull on both ends as you are doing this to tighten up the slip knot.


And here is your slip knot.  It will probably be a pretty big loop, but it is easily adjustable.  Insert your crochet hook and pull on the tail end to tighten.


And there you are.  Easy, right?  You are ready to start your next crochet project!


Be sure to leave a long enough tail so that you can weave it in when you are done crocheting.  You don't want your project that you worked so hard on to come unraveled :)


For some crochet patterns you won't start out with a slip knot, you will start with a magic ring

Comments

Popular posts from this blog

TUTORIAL: Doll Diaper plus Pattern!

  This weekend I made diapers for my little girl's doll.  I probably made more than she needs, but it was so much fun to watch her face light up as I got each one of them finished!    I designed the pattern to fit her Bitty Baby Doll .  But, I also realize that some of you may have a different size doll....  So, I made the waistband adjustable.  It may not fit all of your dolls and stuffed animals, but this will make it more likely to. I wanted it to be a nice and tight fit so that we could fit the doll's pants over the diaper, and it worked out well!   Today I am excited to share the tutorial with you.    Here is what you will need: 1/4 yard or a fat quarter of cotton fabric.  Coordinating thread 1/2" sew in Velcro.  I have tried the stick on kind, and didn't like it.  It eventually comes off.  If you try to sew it on, it will gum up your needle and the needle will have to be replaced.  I highly recommend the sew in kind that is n

O' Crochet Christmas Tree! Crochet TUTORIAL

Materials Needed: -Worsted Weight #4 Yarn.  I used 100% cotton yarn, but acrylic yarn will work well too. -Crochet Hook Size: E/4-3.50MM -Sharp Needle for sewing pieces together -Scissors -Stuffing -Safety Pin for marking your Rnds -Cardboard Abbreviations: Click here for a list of abbreviations. Special Stitches: Beginning Crocodile Stitch: ch 3, (counts as the first dc),      work 5 more dc around the post of the next st,  ch 3,  sl st in the 3rd ch from the hook,  work 6 dc around the post of the next st (beginning crocodile stitch made) Crocodile Stitch: work 6 dc around the post of the next dc, ch 3, sl st in the 3rd ch from the hook, work 6 dc around the post of the next st (crocodile stitch made) Notes: The gauge doesn't matter so much for this pattern because you aren't making an article of clothing that needs to fit someone.  I do tend to crochet very tight (tighter than normal) when I am making amiguru

TUTORIAL: American Girl Crochet Hat

Lately, I have been having so much fun making my girls clothes for their dolls.  My latest project was these cute crochet hats.  They fit nice and tight, and I love the way they look on the dolls.  I am sharing the pattern with you today so that you can make a few for your dolls too! The yarn I used for this hat I purchased online from Fabric.com .  It is called Cotton Classic Yarn.  They have changed their website up a bit and I haven't been able to find it recently, so I am not sure if they are still selling it.  This is my favorite yarn for crocheting Doll hats, so I hope I can find some more in the future.  Materials Needed: DK weight yarn (#3) Crochet hook size: F  5/3.74 MM Click HERE for a list of abbreviations. Notes: -Gauge: 4 sts and 5 rows = 1" (2.5 cm) The gauge is for sc rows.  If your gauge is not right, go up or down a size crochet hook in order to get the right gauge. Instructions: Make a magic loop, ch 1; Rnd 1: 12 hdc in the ring, join